Showing posts with label dark chocolate. Show all posts

February 25, 2014

Vegan Flourless Peanut Butter Chocolate Chip Cookies

No comments:
Pin It!
IIIIIIIIIIII'm back!
 
And I brought cookies!
 
Oh, and I also changed the commenting system - let me know what you think PLEASE.  I won't mind if you hate it, it is still growing on me ;)
 
(Crazy long weekends call for enormous amounts of cookies.  Goes without saying.)
 
And not just any cookies - these are intensely peanut butter-y and studded with smooth dark chocolate.  Although they are small, they pack a powerful punch of the world's best combo - chocolate and peanut butter! 

 
Ever since I tried chickpeas in raw cookie dough, I couldn't wait to try a peanut butter version.  Now, I've attempted beans in baking before and it didn't work.  At all.  So I was a little hesitant to try again.  But these cookies are incredible - they might just be my all time favorite peanut butter cookies.  They are thick, but not fluffy, like some bean based cookies are.  These are dense and a little crumbly.  Each bite tastes buttery, without the annoying greasiness of oil.  And there is nothing in the way of the peanut butter flavor; oh, except for the bites of chocolate, but I can't complain there.  I'll let you in on a little secret -
 
these have no butter
 
or oil
 
or flour
 
and, even though I love eggs, there aren't on the list either. 
 
Vegan chocolate chip peanut butter cookies.  That taste like chocolate chip peanut butter cookies.
 
Totally and completely true.

 
I love mini things and I wish I could say it was for the cute factor.  I'm pretty sure I like them because I can eat three or four or ten.  I'm pretty sure I did just that with these.
 
They are that good.
 
No one will guess they are healthy.  You could eat them for breakfast!  But I really don't like the title breakfast cookies - it makes me think of oat and banana and applesauce.  Don't get me wrong, I really like all of those ingredients, but not when I want something for dessert. 
 
These are healthy enough for breakfast but really and truly taste like dessert. 


Vegan Flourless Peanut Butter Chocolate Chip Cookies
Recipe Source: My Whole Food Life
Yield: 16 cookies

1-1/4 cup chickpeas, cooked
1/2 cup peanut butter + 2 tablespoons
1/3 cup honey *maple syrup for strict vegans*
1 teaspoon baking powder
1/2 cup dark chocolate chips

Preheat oven to 350.
Drain chickpeas and rinse well with cold water.
Blend chickpeas in a good food processor.  (I used my Ninja)
Add peanut butter and honey and blend a couple times until smooth.  (Don't overblend or you'll "burn" your peanut butter)
Stir in baking powder.
Roll into balls; dough will be sticky, but that's okay.
Place on lightly greased cookie sheet.
Press chocolate chips on top of cookie dough.
Bake for 12-14 minutes (mine were done at 12 minutes)
Let cool for a couple minutes.
Serve warm (amazing!) or let cool completely (also really good!)

February 22, 2014

How to Make the Best Homemade Fudge Energy Bars (gluten, dairy, and cocount free)

15 comments:
Pin It!
Welcome to my no bake kitchen.  Because me and the oven have been best of enemies the past week.

 
(funny story about this photo - see the cocoa powder everywhere?  yeah, so I was trying to set a spoonful down on the cutting board, to look all professional, you know? and I lost my balance and flipped the spoon.  hence the cocoa powder everywhere.  my life story)

Ovens need time to heat up. 
Baking needs precise amounts of baking soda.
Cakes and cookies need planning ahead for prep work and cooling time.

Read:  Idonothavetimerightnow.  Or skills - obviously!

I tried a sponge roll cake.  I tried homemade bagels.  I messed up little details on both.  *faceplant*  I DID make these cookies and these cookies, but they weren't blog material because I've already posted them. 

So I stuck with what I know, however uncreative it may be.

No bake energy bites.

 
(don't you just want to finish that bite???)

I am in a not so creative rut right now (hence the lack of posts!)  But I have made these so often (I don't even measure anymore) and this last batch was so good I decided to go ahead and share it with you ... and since I didn't have anything else.

So today I'm going to break down why these are the best homemade fudge energy bites and how you can make them at home, too!


First up: the dates.  aka the key to refined sugar free energy bites.  Dates are the sticky sweetness that makes these taste like a dessert.  And without them, your energy bites will fall apart.  They contribute all of the wet ingredients that hold these bites together.  As for nutritional value, dates are a pretty good source of fiber, especially compared to honey and white sugar.

Next: the almonds!  All nuts, when blended enough, become like a butter.  I don't do that with the almonds in this recipe, but I blend them enough so that their natural fats create a thicker, firmer mixture.  Thanks to the almonds, these energy bites have a nutty, stick-to-ya factor.  You want to make sure you have at least 1:1 ratio of nuts to dates in these kind of recipes.  Otherwise, you will have a wet and sticky hot mess on your hands.  Trust me from multiple experiences.  And, almonds pack a big punch of healthy fats, and protein. 

Third on the list: oats.  Although oats have a bad rap thanks to clumpy lumpy bowls of oatmeal, these energy bites will have you taking back any nasty comments.  Instead of the traditional flour, oats are a hearty gluten free option.  They soak up any extra moisture, ensuring you don't have a wet and sticky hot mess described above.  They aren't usually used in Larabar or Clif bar copycats, but I like the chewiness that oats add.  Plus, they are a great source of fiber!

Finally, our choc-o-la-tay!  On to the goods!  Cocoa powder is an awesome substitute for flour in recipes where you want more chocolate oomph.  It serves the same purpose as the oats in terms of adding body to the energy bites, but it is obviously for the fudge factor.  When cocoa powder combines with dates, you've got a major fudge thing going on.  The rich and chewy fudginess is so darn good!  I use a hefty three tablespoons, but these aren't bitter (also learned from previous experiences) thanks to the dates and the ...

... Dark chocolate chips - don't you dare point to these little beauties and slam these energy bites as unhealthy.  Dark chocolate is good for you (or so I hear ... and tell myself as I eat half the bag) because of all those antioxidants.  (I honestly have no idea what they are but I hear they are good for me.)  And seriously, dark chocolate chips taste amazing. 


Blend those all up, with a little water to make it smoother, and roll into balls. 

Instant fudge gratification. 

These are some of my favorite things to make.  We're talking serious fudge truffles here!  When I want chocolate, I don't want to wait 45 minutes for brownies.  Now I don't have to.  These satisfy my random chocolate fixes in five minutes AND keep me fueled all morning and afternoon ... and afternight. 

In. Love. 

Homemade Fudge Energy Bites
Recipe Source: The Sweet {Tooth} Life
Yield: 12 bites

1/2 cup pitted dates
1/2 cup slivered almonds
1/3 cup oats
3 tablespoons cocoa powder
1/4 cup dark chocolate chips
Water

In a good food processor (I used my Ninja) blend the dates with 3 tablespoons of water. (It is okay if they aren't super smooth)
Add almonds and oats and blend again.
Add cocoa powder, chocolate chips, and 1-2 tablespoons more water.  (Start with 1 tablespoon water and if you need more, add the second tablespoon.)
Roll into 12 balls.
Enjoy healthy fudge bliss.
If you have any, store leftovers in refrigerator.

February 17, 2014

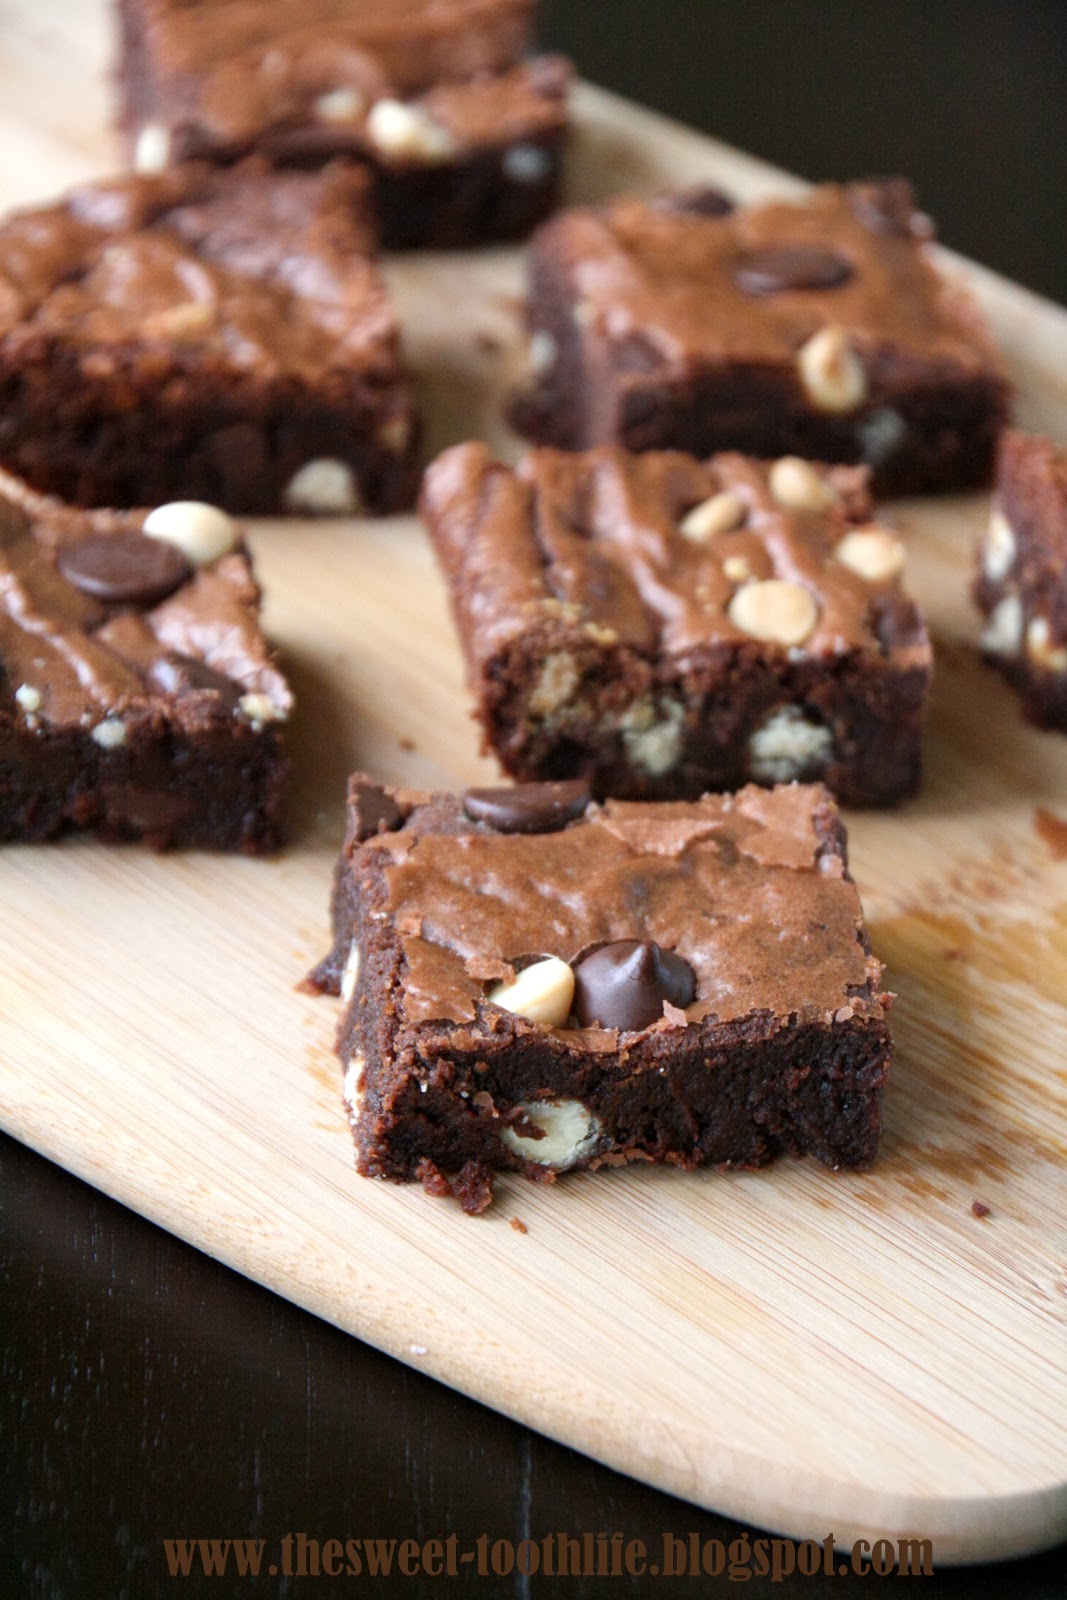
Double Chocolate Pudding Brownies

23 comments:
Pin It!
Hi, my name is Mary Frances and I am a brownie snob.

I obviously need help with my diplomacy skills, but I don't think you'll mind when you take a look at these brownies. 

 
If I worked at a brownie factory (which I actually kind of do ... that's a scary thought) this would be my checklist:
 
Super fudgy
Intensely chocolatey
Soft and moist
A little undercooked in the middle
Packed with baking chips, preferably more chocolate.
Crackly edge on top
Melt in your mouth brownie in the middle
 
Check, check, check ...
 
These pass with flying colors.


Pudding mix has become a pantry staple and not because I love pudding.  Pudding mix is the key to super soft everything.  I've only tried it in cookies, but I thought, why not in brownies?  Pudding mix is basically cornstarch (that is the secret right there) and sugar - how could I hurt anything? 
 
These brownies are the softest, moistest, fudgiest brownies ever. 
 
And the prep work takes only five minutes.  I found myself very short on time and in very much need of a pan of brownies.  Duncan Hines Fudgy Brownie Mix to the rescue!  This is also a pantry staple.  I know some of you have perfected the copycat bersion, but nothing beats mixing egg, water, oil, and a bag of brownie mix when I am stressed and short on time.  Dressing up brownie mixes makes me feel better about myself - I'm not the one bringing store bought desserts, no, not I! 
 
Don't say anything, okay?
 
In my head, using brownie mix and pudding mix makes these practically homemade.  Two negatives make a positive, right? :)  These are positively delicious and the white and dark chocolate chips make them even better.  Plus, what kid is going to pass up white and dark chocolate chip studded brownies?  Not I!
 
Neither did my family - the whole 9x13 pan was gone in a very short time.  The brownie factory is back on call and in hurried business again, as usual.  Time to go find that checklist!


So, I confessed, I am a brownie snob.  We all are snobs (the word is really bothering me now - it looks so ugly in print!) about some food - my dad is a cinnamon roll snob (though I doubt he would admit it ;) and our whole family are apple snobs (sweet and crunchy is the only way to go.)  How about you?  What food do you hold a high standard for?


Double Chocolate Pudding Cookies
Recipe Source: The Sweet {Tooth} Life
Yield: 16-24 servings

1 package instant chocolate pudding mix (the four serving box)
1 (18.5 oz) package brownie mix
1/2 cup oil*
1/4 cup water*
2 eggs*
1/2 cup dark chocolate chips
1/2 cup white chocolate chips
Dark and white chocolate chips for sprinkling on top (opt)

Preheat oven to 350.
Beat eggs in a large bowl.
Add water and oil.
Whisk pudding mix and brownie mix together.
Add to wet ingredients and stir.
Fold in dark and white chocolate chips.
Pour into a lightly greased 9x13 pan.
Sprinkle reserved white and dark chocolate chips on top, if desired.
Bake for 30-35 minutes.
Let cool for 15 minutes before serving.

January 30, 2014

Fudgy & Skinny Red Velvet Brownies

28 comments:
Pin It!
Soooo, I just watched Frozen.

And now I'm listening to "Let It Go" and pinning pictures of Olaf every five minutes. 

(Wait, did I just say that out loud?)

I'll spare you my praises for the characters and plot line because really, just go watch it and save us all the trouble. But, I will say, I loved that Frozen realistically showed true love. Ana thought it was at first sight, but it couldn't be. It just can't happen. And I love that, finally, Disney reflected reality, but not as a kill joy, but as a teacher and motivator. Ana learned (among other things) that true love requres sacrifice and energy and time. 

(And now I'll stop - no spoilers)

 
Valentines Day is in two weeks and to be honest, I've never celebrated the holiday. (Feel free to speculate as to why …)  But my Dad always gets my mom a box of chocolates and roses, whether he is here at home or across the country on business.  It might be an inconvenience, but he doesn't act like it. Or, when he spends the night at hotels, they let him choose a water, or a trail mix, or whatever, to make your stay "the best it can be."  My dad doesn't like chocolate, but he always chooses the Toblerone and brings it home for Mom.  That's love.  I think, at least in my age group, love can get down played, especially in dating and especially during Valentine's.  Love requres sacrifice. Energy. Time. Not hand holding or flower buying. It's putting someone else before yourself and I'm grateful my parents have been an example of that. 

And, I love that Disney is beginning to promote that truth as well. Ana thought she knew who her true love was, because it was "love at first sight."  Guys, these brownies were love at first sight.  But they weren't love at first taste. I  told a friend how bummed I was because the texture was great, the color was what I wanted, but the flavor just wasn't … sweet, and brownies are supposed to be sweet. The original recipe had called for all honey as it's sweetener, and although I was hesitant, I did it. I was regretting it after my first bite. I wasn't going to blog these. I was going to redo them. But before that could happen, we had to finish the first pan. So, a day after making them, I cut myself a piece from the nearly untouched pan and flinched as I took a bite. But then, I realized, this tastes like a brownie!  This tastes good, like, really good!

 
These brownies are no light weights.  They are moist and thick and dense - and chocolatey sweet.  They're delicious!  But, they need time.  Don't eat them right out of the oven.  Give the yogurt and the cocoa and the honey a day to meet each other and like each other and trust me, these brownies will be your new love.

Even though these need time, they don't need sacrifice or energy.  They are only one bowl and have healthy ingredients that are easy to find!  Greek yogurt provides all the "fat" and adds most of the body and moisture.  These are also completely whole wheat!  Whole wheat things are supposed to be painfully heavy and dry.  Not these; thanks to the yogurt and honey, these are heavy, but in the fudgiest way possible.  Also, I only used a teaspoon of red food coloring, because that was all we had :) and they turned out somewhat red.  If you want a deeper color, just add more food coloring.  Whatever the shade, these brownies win top award!


Between Frozen and these brownies, I was reminded that real friendships need time and that basing my opinions on someone after just meeting them isn't the wisest idea, nor the most accurate.  It is hard for me to not judge someone based on their hair or one word they said in a conversation.  I need to give people time.  Their true colors will show eventually, they always do (ahem, Frozen) and then I can decide whether they are real friends or not.  Honestly, after I get to know someone, I usually have to take back my first opinion. 
 
Thank goodness these brownies don't need several weeks or even years to decide whether or not they are good!


Fudgy and Skinny Red Velvet Brownies
Recipe Source: Adapted from Sally's Baking Addiction
Yield: 12-16 servings
Heaping 1 cup plain yogurt (greek or regular, nonfat or low fat) 
1 egg + 1 egg white 
1/2 cup milk ( I used low fat)
2/3 cup honey
3/4 cup whole wheat flour 
3/4 cup cocoa powder 
1-1/2 teaspoon baking soda 
1/4 teaspoon salt
1 teaspoon red food coloring
2/3 cup dark chocolate chips (use sugar free chocolate chips to keep these refined sugar free)

Preheat oven to 350.
Whisk yogurt, egg and egg white, milk, and honey together. 
Add flour, cocoa powder, baking soda, and salt.  Stir well.
Add red food coloring and stir until all the food coloring is incorporated.  (Add more if you want a deeper red.  But be careful; a little goes a long ways!)
Stir in chocolate chips.
Bake for 40-45 minutes.
Let cool and sit overnight. 
Enjoy!

January 20, 2014

Super Easy Dark Chocolate Toffee Fudge

29 comments:
Pin It!
This is a fudge anyone can do!   It's very rich and creamy, but very simple.  There are only 6 ingredients and is perfect for when you are very short on time. 


Now, you might be thinking those are chopped nuts - guys, I do not do nuts in my fudge.  Or brownies.  Those are Heath toffee bits and they are incredible!  They are sweet, add some crunch, but also melt in your mouth.  They pair with the decadently creamy dark chocolate to make some of the richest fudge I've ever eaten.  Honestly, why buy fudge when you can make this at home?  In, like, 10 minutes?  You only need small pieces, although I love to sink my teeth into a big, thick square.  


This is the fudge recipe I have used for years and years, in fact, it was one if the first recipes I was comfortable making when Mom wasn't there. It was my beginning baker recipe that I could take to piano recitals and parties and classes.  John Caleb and the girls were my baking buddies and really, all you have to do is melt, stir, spread.  It is something they can't mess up and can be successful with.


Now, I really don't know what to say about the eggs ... this recipe is from a cookbook and I've always made it this way.  No one has ever gotten sick and we have eaten more batches of this than I can count.  I assume you could omit if you aren't comfortable with the egg, but it does make it richer and creamier. 


Super Easy Dark Chocolate Heath Fudge
Recipe Source: The Sweet {Tooth} Life. Adapted from Colorado Cookbook. 
Yield: 16 large pieces, 25 small pieces 

1/2 cup butter 
12 oz. dark chocolate chips 
2-1/2 cups powdered sugar 
2 eggs
1 teaspoon vanilla 
3/4 cup Heath toffee bits 

Melt butter and chocolate chips together. Stir until smooth and fully melted. Set aside. 
Beat eggs and vanilla in a large bowl until eggs are light colored and frothy. 
Slowly add powdered sugar and melted chocolate, stirring quickly.  
Add toffee chips and stir. 
Pour into a greased 9x9 pan.  
If you are really short on time, stick in the freezer for 10-15 minutes before cutting and serving and it will be the perfect texture. Otherwise, just store in the refrigerator for at least four hours. Refrigerate leftovers. 

January 10, 2014

{Whole Wheat} Caramel Dark Chocolate Chip Bagels

13 comments:
Pin It!
You are only eight ingredients away from homemade, from scratch caramel chocolate bagels that give Panera Bread a run for their money. 

 
Sundays are special days.

It is the Lord's day.

It is the last day of the weekend.

It is the day everyone is home.

It is the day we get bagels at church.


(and it is the day of my volleyball practices. All those things mentioned?  I really like Sundays)

Back to the bagels; a couple years ago, we had several gals from our church that worked at Panera Bread.  Panera Bread let them take all their leftover/old breads, bagels, desserts, etc., on Saturday and we've had Panera Bread and coffee every Sunday for many Sundays now.  My siblings always look forward to the bagels.  Oh, and the cookies.  But the chocolate chip bagels are very popular.


I decided to make them at home.  Originally, I was going to do salted caramel and coconut (it was one of my New Year's Resolutions) but after the salted chocolate and coconut popcorn, I decided two salt + coconut recipes in a row was a little too much.

So I added caramel.  

Total win.


I used Kraft's caramel bits, but I bet you could also chop up their caramels. The caramel bits soften throughout the baking and especially after being stored overnight.  The chocolate and caramel kind of melt into the bagel, spreading those flavors throughout the whole bagel. The texture is spot on; chewy edges and soft centers. When they tried these bagels, my family described them as having "excellent flavor and texture"  Guys, do you know how technical that is for them?  Usually I get a "mmff, good" or "it's sweet!"  I was even surprised at how authentic it was. Just like Panera.

I take that back. 

Even better.
 
 
{Whole Wheat} Caramel Dark Chocolate Chip Bagels
Recipe Source: The Sweet {Tooth} Life.  Adapted from Heather's French Press
Yield: 8 bagels

1 package of active dry yeast
2 tablespoon sugar
1 1/4 cups of warm water
1-3/4 cups whole wheat flour
1-3/4 cups all purpose flour
1 1/2 teaspoon salt
1/3 cup caramel bits
1/2 cup dark chocolate chips
 
Dissolve the yeast and sugar in 1/2 cup of warm water and let rest for five minutes. 
Mix together the salt and the flours. 
Add the yeast and the additional water to the flour mixture. 
Fold in the caramel and chocolate chips.
Knead until you have a soft and elastic dough, either by hand or using the dough hook of a stand mixer.  Cover the dough and let rise until doubled, about 1-1/2 hours.
After the dough has risen, divide the dough into 8 balls .
Press into the center of each ball forming a hole, and stretch to form the bagel shape.  Place on a cookie sheet and let rest 30 more minutes. 
Pre-heat the oven 425 degrees.  Bring a large pot of water to a boil.
Boil the bagels - 1 or 2 at a time for 3 - 4 minutes.  (they will float to the top when ready)
Place on baking sheet and bake 20 minutes. 

January 6, 2014

Salted Chocolate Coconut Popcorn

40 comments:
Pin It!
I always claimed to be a sweet and salty kinda gal, but to be honest, my exposure to sweet and salty was limited to, well, I honestly can't think of anything off the top of my head.  (I can just see the shame I'm bringing down on the sweet and salty club.)


But now that I officially tried it, I can't stop adding salt to all my desserts. It's really weird, but it is so good. I might actually get around to the whole salt-on-watermelon thing this summer. 

It all started with a recipe I can't tell you about right me because I'm going to post it soon, but lets just say, it took the veil off my eyes and opened a world full of salt.


My sodium intake will probably double and my doctors will probably roll their eyes every time they see me, but that doesn't matter because - oh, their eyes are already back in their heads when I show up. (I'm only half kidding.  I get hurt and sick - a lot - in the randomest ways. My doctors love me.)


Just in case you were wondering, my hands are not that cute (right now, the skin is dry and the nails even more cracked, if that were possible) but Abigail's sure are!  She graciously let me use her as a photo assistant.

Anyways, salted chocolate. What an easy way to upgrade!  And it coats our popcorn, making it irresistible. I threw in some coconut, because coconut is plain good and I really like coconut and chocolate, but also to add some texture and chew to the popcorn. My mom, who really isn't a big fan of coconut, gave me the mock groan when she saw it, but after a handful, decided that this was really good and it was ok that there was coconut. 

This stuff is so easy and so good and so easy to snack on!  There is no baking, only one bowl, and five ingredients. I melted the chocolate, poured it over the popped popcorn, added the coconut, and then sprinkled the salt on top. I used a tablespoon and it added enough that it was salty, but not too much so that the salt was all you tasted. I think I was more sensitive to the salt because this was my first salty chocolate, but I really liked it. If you don't believe me, I'll show you the empty bowl. And the three salted dessert recipes I have ready to go.


Salted Chocolate Coconut Popcorn
Recipe Source: The Sweet {Tooth} Life 
Yield: 4-5 cups 

1/4 cup unpopped popcorn kernels (yields about 4-5 cups) 
1/2 cup dark chocolate chips 
1 teaspoon oil (coconut, canola, or olive)
3/4 cup coconut 
Sea salt (I used about a tablespoon, but adjust to personal preference)

Pop your popcorn.  (An easy way is to place your kernels in a brown paper sack and just microwave for 90 seconds.  Easy, oil free popcorn!)  Then, melt your dark chocolate with the oil.  To do this, place your chocolate chips in a microwave safe  bowl and drizzle the oil over the chips.  Microwave for one minutes, stirring every 30 seconds.  Drizzle over the popped popcorn.  Stir in the coconut.  Sprinkle on the salt.  And now you can eat and enjoy!

Related Recipes:

Popcorn n' Pretzel Butterscotch Puppy Chow


Brown Butter Coconut Caramel Popcorn Blondies


January 2, 2014

Whole Wheat Greek Yogurt Mint and Dark Chocolate Cookies

15 comments:
Pin It!
I've seen so many cookie recipes that had cream cheese, sour cream, or Greek yogurt in them and I have been dying to try it.

I've decided my "New Year's Resolutions" are going to be all recipes I need to make.  That is acceptable, right?

Cream cheese, etc. cookies were on the list. Now I can scratch them of.  First up: More homemade granolas.  Then, a a three layer cake.  And then, well, I think salted caramel + coconut would be good.  I'm not putting greek yogurt on the list, but I would like to do more with that.  You know what really needs to happen?  I have got to be more disciplined in responding to all your wonderful comments.  I was adding recipes to my recipe page (another thing I am TERRIBLE about keeping up with) and realized how many comments I didn't respond to.  I felt really bad!  So I'm going to reply as soon as possible instead of waiting to do it all at once.


Ok, back to the cookies.  Consuelo's recipe caught my eye, especially when she said her brother's couldn't tell a difference from this version to the real version!


Now, there are a couple things you should know about these cookies (besides the usual "they are amazing!")  They are uber soft.  They hold up well, but they are pretty moist, which I love, but if you are hard and crunchy cookie person, then you won't like these.  As you can tell, they stack fine, so they aren't falling apart, but if you don't plan on eating them in the next couple days after baking, freeze 'em, because they're too moist and soft to store for that long.  Read: mold - and that isn't the green we are going for!

But those green chocolate chips?  They are good!  They were part of a holiday chocolate chip mix, with mint chips and dark chocolate chips.  They were on sale and since mint and chocolate counts as a "classic" combo, I felt okay about posting them after Christmas.  Read: Yeah, I'm behind.  What else is new ;)

Oh, also, I'm going to grind my oats next time.  They didn't soften into the baked cookie as much as I thought they would and did add texture.  I was good with it, but my mom was convinced, I mean convinced it was coconut.  Just a warning if you don't like texture in your cookie. 

 
Overall, I really liked how they turned out!  They were soft, melt in your mouth, and sturdy enough to travel.  And they are completely whole wheat and have almost a cup of Greek yogurt, which means you can indulge your mint and chocolate craving without a problem. 

Update!!!  Okay, this might sound strange, and it probably is, but it works.  Freeze these cookies and eat them frozen.  I know, it sounds wrong, but it isn't!  Because these are so soft, they don't freeze solid, they are just firmer and a little denser.  They are delicious either way, but after trying a frozen one, I liked it better. 

They look exactly like regular cookies, and if you didn't know better, you would think they were made with all butter and white flour.  Finally, a healthy cookie that isn't no bake!  Thanks Consuelo!

 
Whole Wheat Greek Yogurt Mint & Dark Chocolate Cookies
Recipe Source: The Sweet {Tooth} Life.  Adapted from Honey and Figs Kitchen
Yield: 16 cookies

heaping 1 cup whole wheat flour
1/3 cup oats (I would suggest grinding them if you don't like textured cookies)
scant 1/4 cup cornstarch
scant 1 cup plain Greek yogurt
6 tablespoons butter, melted
1 egg
1/3 cup white sugar
1/4 cup brown sugar, packed
1 tablespoon vanilla
1 teaspoon baking powder
1/8 teaspoon baking soda
1/8 teaspoon salt
2/3 cup mint and dark chocolate chips

Preheat oven to 350.  Lightly grease cookie sheets

Beat butter, Greek yogurt, and egg together.  Add sugars and beat again.  Add flour, oats, cornstarch, powder, soda, and salt and stir until combined.  Stir in chocolate chips.
Let chill in freezer for 30 minutes or in refrigerator for several hours. 
Scoop chilled dough onto baking sheets.  Flatten cookies slightly.  Bake for 13-15 minutes.  Do not bake any longer than this!  Let cool on pans for five minutes before letting cookies cool completely on wire racks.  Store in air tight container or freeze. 

December 31, 2013

Homemade Healthy Butterfingers

22 comments:
Pin It!
So New Years is coming up and along with it are lots of resolutions.  So I decided to post a healthy recipe to help us all out.

Oh my gosh, there are absolutely incredible.  Like, I literally made three pans of this in three weeks and I ate all three pans.


I think I negated all the healthiness with all that peanut butter!  I cannot get enough of the combo of peanut butter and chocolate.  I had six Reeses peanut butter cups for breakfast the morning after Christmas.

You think I'm kidding.


Anyways, these are incredible.  I didn't expect much from these, but these are so good.  Who would have thought bran flakes with peanut butter and molasses and chocolate would make a very realistic copycat???  Granted, it may not taste exactly like the real thing, but it is pretty darn close.  So don't eat this and then take a bite of a real Butterfinger because it will taste a little different.  The molasses is key. It's not a dominant flavor, but it helps create the Butterfinger flavor.


This recipe is from Chocolate Covered Katie and the first time I followed the recipe as followed, using corn flakes instead of bran flakes.  The second time, I used bran flakes.  The third time, I subbed a scant 3/4 cup dates for the 1/2 cup honey and used bran flakes and honestly, there really wasn't a noticeable difference. 

The peanut butter flavor is the strongest and the bran flakes add that crunch.  They are mixed with the peanut butter and soften into a chewy and dense texture.  I was wary that freezing them wouldn't have the authentic flavor, but lo and behold, it works!  I hope you try these, they are easy, done in five minutes, and are delicious and healthy.


Homemade Healthy Butterfingers
Recipe Source: The Sweet {Tooth} Life.  Adapted slightly from Chocolate Covered Katie
Yield: 8-10 bars

2 cup bran flakes (you can also use corn flakes)
scant 3/4 cup pitted dates
1 tablespoon molasses
1 cup peanut butter
2/3 cup dark chocolate chips

Soak dates in water for 15-30 minutes.  Drain and blend in a food processor until smooth.  Add peanut butter and molasses and blend again.  Heat in a small pot for a couple minutes or until smooth and slightly runny.  Lightly crush bran flakes and add to peanut butter mixture.  Press into a lightly greased 9x9 pan and freeze.  Cut into 8-10 bars.  Melt chocolate chips.  Dip bars in melted chocolate and freeze again.  Enjoy!
 
Related Recipes:


December 28, 2013

Greek Yogurt Pumpkin Dark Chocolate Chip Bread

10 comments:
Pin It!
So, who waits until right after Christmas to pull out a pumpkin recipe?


Yep, that would be me.  My true colors show.  #pumpkinlove

It all started with my crazy good banana bread ... which I made into white chocolate cranberry banana loaves ... which I then made into pumpkin bread for a volleyball tournament because we were out of bananas.

And it was so good, I just couldn't not share it with you.

Once again, greek yogurt saves the day again by adding protein, calcium, and that wonderful soft crumb I love in this quick bread recipe.  The pumpkin flavor is less subtle, but without it, this wouldn't be moist and soft and so pretty!  I really like the color pumpkin gives baked goods:)  I used dark chocolate chips which melted into incredible chocolate pockets throughout the whole bread.  They are the best part, but what can I say?  #chocolatelove

 
I cannot get enough bananas (I probably eat 1-2 every day ... #bananalove ... this is getting ridiculous! #allfoodlove) but I actually liked not having that flavor in this bread.  The pumpkin and the chocolate got to shine and that combo is amazing.  Lots of sweet chocolate, hints of pumpkin spice, and tons of moist sweet bread amazingness. 


I could eat sweet breads over cookies any day, but I have been eating lots and lots of good food the last couple days!  Blondies and lemon bars ... I'll be needing some greek yogurt bread now that I'm home!  Christmas was just wonderful and I'm still enjoying getting to sleep in.  A recap on Christmas is coming soon!

 
Greek Yogurt Pumpkin Dark Chocolate Chip Bread
Recipe Source: The Sweet {Tooth} Life
Yield: 12 slices
 
3/4 cup plain greek yogurt (I used nonfat)
3/4 cup sugar
1 teaspoon pumpkin pie spice
1 teaspoon cinnamon
1 cup pumpkin puree
2 eggs
1-1/2 cups flour (either 100% all purpose, or 1/2 whole wheat, 1/2 all purpose)
1 teaspoon salt
1 teaspoon baking powder
1 teaspoon vanilla
1 cup dark chocolate chips
 
Stir first five ingredients together.  Add eggs, beat well after each addition.  Stir together next five ingredients and add to wet ingredients.  Stir until combined.  Add chocolate chips.  Pour into a greased loaf pan and bake at 350 for 45-50 minutes. 

December 13, 2013

White and Dark Chocolate Heath Cheesecake Pudding Cookies

13 comments:
Pin It!
These are the best cookies I've eaten in a really long time.  Not only are they are super soft on the inside, they are stuffed with three kinds of baking chips; white chocolate, dark chocolate, and toffee.  Oh, and there is cheesecake pudding mix in there too.  Pudding mix, which has cornstarch, is the key to the softest cookies around.


These have restored my faith in cookies.  I will take yeasted breads over cookies any day, but these, well, these stole my heart and then some.  I will not touch 
crunchy cookies, unless they're fortune cookies.  These are soft and chewy, yet firm enough to stand up to double fisted eaters (ahem)  They are perfect for Christmas time.  They freeze well, in baked or unbaked form, and travel well. 


I was cleaning out our baking chips and it was incredible 1) how many bags we have! and 2) how many of them were half full.  These cookies got rid of those half bags of baking chips that begin to take over our pantry. Between the peanut butter chips, Andes mint, Heath, milk, semi sweet, and dark chocolate chips, I think I'm set for a while!

  
Do you guys clean out your closets before Christmas?  I'm thinking it would be a good idea if I got rid of some stuff. :)  Christmas is all fun and games until you have to find a place for all your new stuff.  As I've gotten older, I've (thankfully!) gotten smaller gifts ... no more play kitchens or Play mobile sets or American girl doll bathtubs (yes, really.)  Though looking at my list, what I really need to clean out is our kitchen.  We've never made Christmas lists in our family, but this year, we drew names among siblings for a secret santa type thing. We all made a list of five things we want so that the sibling that has us wouldn't have to ask us (giving it away) or buy something we won't use.  One of my things was a donut pan, so while there may be a lot of cookie recipes these next few weeks, I'm hoping after Christmas, I'll have some donut recipes to share with you guys!  However, that would mean I have to have a place to store it ... 

  
Any kitchen gadgets you're wishing for this Christmas? 
 
And, what is your favorite cookie recipe?  I'd love links in the comments!

 
White and Dark Chocolate Cheesecake Heath Pudding Cookies
Recipe Source: The Sweet {Tooth} Life.  Adapted slightly from here and here.  
Yield: 2-1/2 dozen
 
1 cup shortening
1 cup sugar 
2 eggs
2 teaspoons vanilla
2 cups flour
3/4 teaspoon salt
3/4 teaspoon baking powder
1 box (4 serving size) instant cheesecake pudding mix
3/4 cup white chocolate chips
3/4 cup dark chocolate chips
1/2 cup Heath toffee baking bits
 
Cream shortening and sugar together.  Add eggs and beat well.  Stir in vanilla.  Add flour, salt, baking powder, and pudding mix and mix until incorporated.  Add white chocolate chips, dark chocolate chips, and Heath toffee chips and stir.  Scoop cookies (I used a two tablespoon scoop) onto a lightly greased baking sheet.  Bake for 10-12 minutes.  Even if they look undercooked, don't let them bake for more than 12 minutes.  Let cool for a couple minutes.  They are incredible warm!
 
Note:  After cooling, store in an airtight container.  You can scoop cookie dough onto a baking sheet and freeze for a couple hours.  Then, put the frozen cookie dough in a freezer bag and store in freezer, if desired.  To cook, let thaw in refrigerator for a couple hours before baking. 
 
Other cookies for your Christmas platter!


Click here for all my cookie recipes!


DMCA.com Protection